How I Capture Exposures Longer Than 30 Seconds on a Nikon D3400
Contents
- Introduction
- What DigiCamControl Solves
- Connecting the Nikon D3400
- Using Bulb Mode (Astro Module) for Long Exposures
- A Real Astrophotography Session
- A Few Tips From the Field
- Frequently Asked Questions
- Final Thoughts
Introduction
When I first started astrophotography with my Nikon D3400, one of the biggest challenges was automating image capture.
If you’ve searched for ways to capture exposures longer than 30 seconds on a Nikon D3400, you’ve probably discovered two limitations fairly quickly:
- The camera is limited to 30 second exposures in manual mode.
- There is no intervalometer port for automating long imaging sessions.
DigiCamControl solves both problems through a simple USB connection.
Most of my early sessions were untracked, which meant exposure times of only a few seconds. A single imaging session could easily produce hundreds or even thousands of light frames, and manually pressing the shutter button for every exposure was simply not practical.
Unlike many cameras used for astrophotography, the Nikon D3400 does not have an intervalometer port. This limits the options for automating image capture and leaves very few choices without buying additional hardware.
My workaround at the time was to use the camera’s Self-timer mode. I could configure it to capture a sequence of up to 9 images with a single button press, but once those 9 images were finished I had to start the sequence again. It worked, but spending an entire imaging session repeating the same task quickly became tiresome.
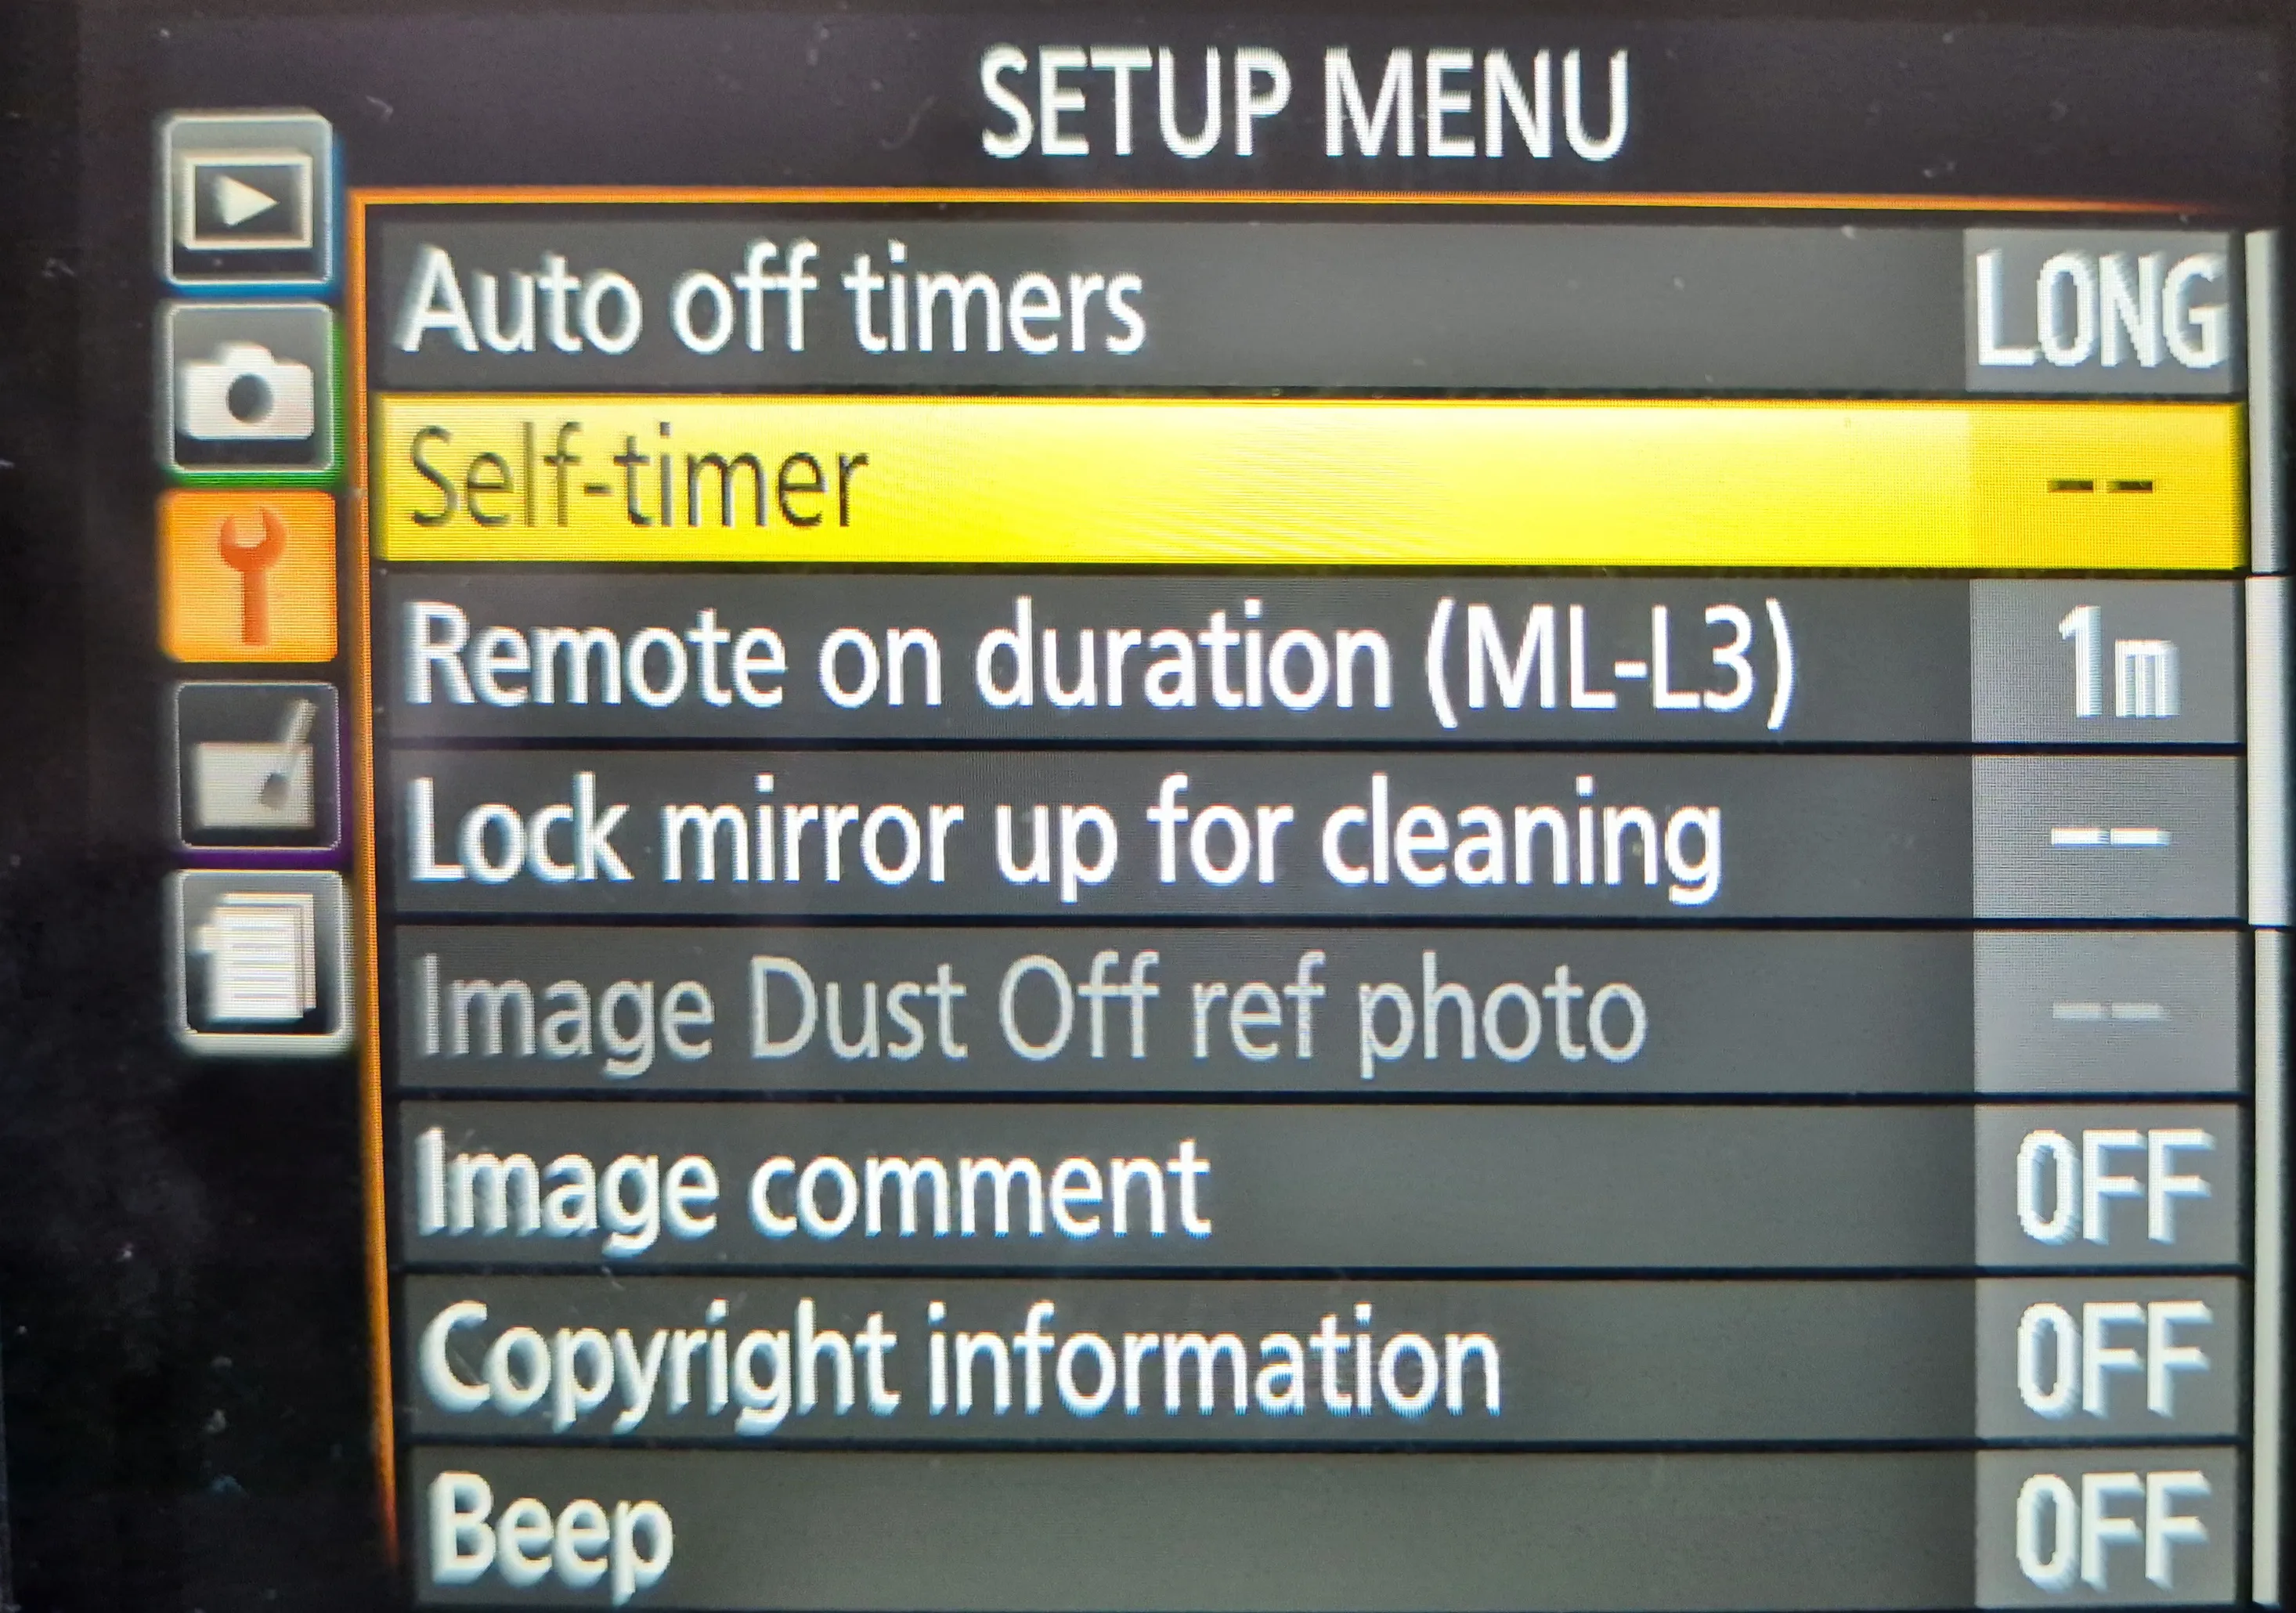 Nikon D3400 Self-Timer settings menu. Before using DigiCamControl, I relied on this mode to automatically capture short sequences of images.
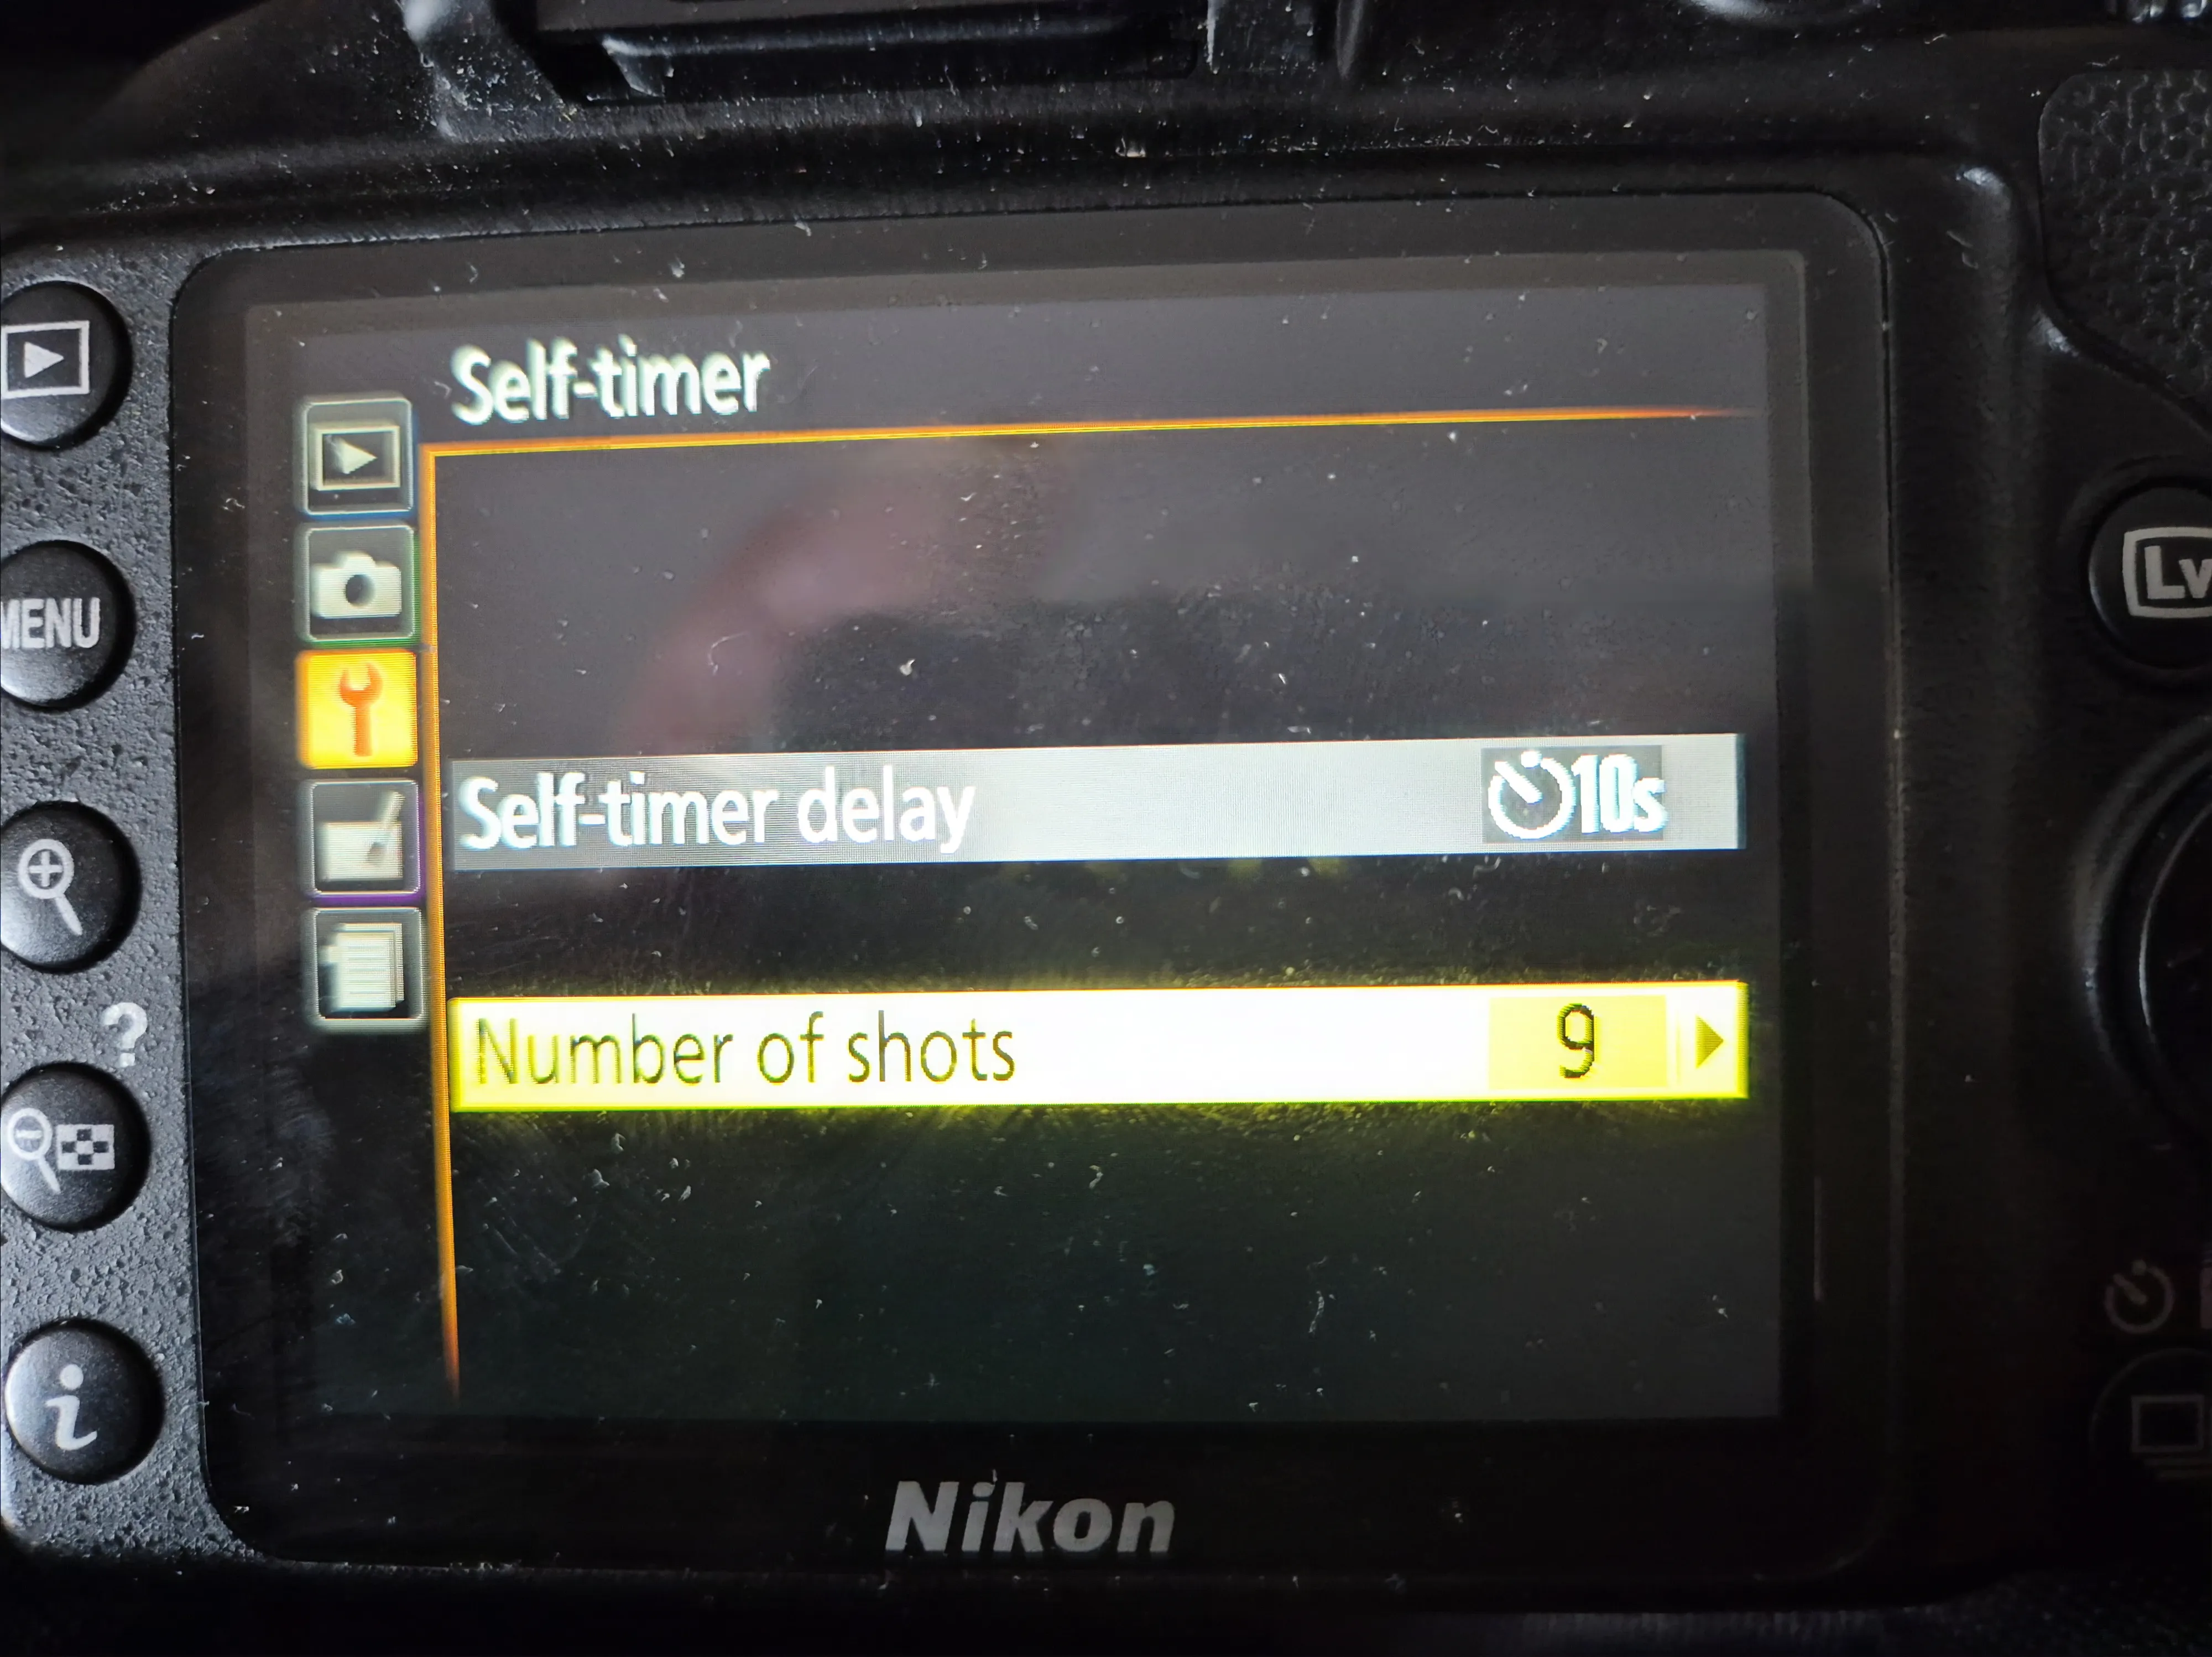 The Nikon D3400 can capture up to 9 images automatically using Self-Timer mode, but the sequence must be restarted manually once it finishes.
Things became even more challenging when I bought a Sky-Watcher Star Adventurer 2i and started experimenting with tracked astrophotography. For the first time, I wanted to capture exposures longer than 30 seconds. That’s when I discovered another limitation of the D3400. The camera only allows shutter speeds up to 30 seconds unless you use bulb mode.
At that point I needed a solution that could not only automate image capture, but also control bulb exposures from a laptop. After some research I came across DigiCamControl.
What started as a way to overcome a few limitations of the Nikon D3400 quickly became an essential part of my astrophotography workflow. I still use DigiCamControl for every imaging session today, whether I am capturing short untracked exposures or several hours of tracked data with the Star Adventurer 2i.
If you’re completely new to astrophotography, you may also want to read my guide to Nikon D3400 astrophotography.
In this article I’ll show how I use DigiCamControl with my Nikon D3400, how I automate image sequences, and how it allows me to capture exposures longer than 30 seconds for deep sky astrophotography.
Whether you’re looking for a Nikon D3400 intervalometer alternative or a way to capture exposures longer than 30 seconds, DigiCamControl provides a simple solution using nothing more than a USB cable.
What DigiCamControl Solves
For astrophotography with a Nikon D3400 DSLR, the software addresses two major limitations.
The first is automation. Whether you’re shooting untracked exposures that last only a few seconds or tracked exposures that last up to several minutes, manually triggering hundreds of images quickly becomes tedious. DigiCamControl can automatically capture an entire sequence while you focus on other things.
The second is bulb mode control. The Nikon D3400 allows shutter speeds up to 30 seconds directly from the camera. Longer exposures require bulb mode, but without a dedicated intervalometer port there are limited options for controlling those exposures automatically. The software allows exposure durations to be defined directly from the computer or laptop, making 60 second, 120 second, or even longer exposures straightforward.
Many Nikon D3400 owners search for an intervalometer solution, only to discover that the camera lacks a dedicated intervalometer port. The application provides a practical workaround using the camera’s USB connection, allowing both automated capture sequences and bulb exposures without additional hardware.
For me, this meant I could move from manually managing every exposure to simply creating a sequence, starting it, and letting the camera work on its own.
Over the past several months I have used it for everything from short untracked imaging sessions producing thousands of frames to multi hour tracked sessions on the Star Adventurer 2i.
Whether I’m capturing a few hundred short exposures from a fixed tripod or several hours of tracked data, the workflow remains largely the same. I set up the sequence, start the capture, and let the software handle the repetitive part of the session.
Connecting the Nikon D3400
Before getting started, you’ll need to download and install the software from the official website. The software is completely free and supports a wide range of Nikon DSLR cameras, including the Nikon D3400.
To connect the camera, you’ll need a USB cable with a standard USB connector on the computer side and a Micro USB connector on the camera side. The Nikon D3400 uses a Micro USB port, so if you no longer have the original Nikon cable, you may need to purchase a replacement.
Once the program is installed, connect the camera to your computer, turn the camera on, and launch the software. In my experience, the DSLR is usually detected immediately without any additional drivers or configuration.
If the camera isn’t detected, or if it disconnects during a session, there is one thing worth trying before digging into troubleshooting. From the top menu, select Camera → Refresh Camera List.
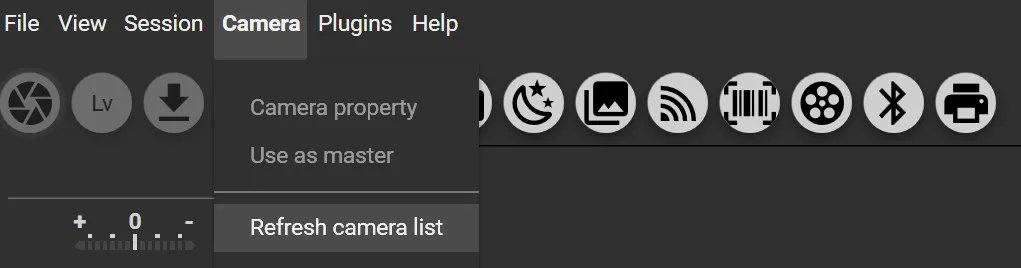 Location of the Refresh camera list menu option.
This is the only connection issue I’ve personally encountered, and refreshing the camera list has always resolved it without needing to restart either the software or the camera.
Before starting an imaging session, I also recommend checking the camera’s power saving settings. During astrophotography sessions, the camera may sit idle while you’re focusing, framing a target, performing polar alignment, or making other adjustments. The last thing you want is for the camera to enter sleep mode just before starting a long capture sequence.
Once connected, the software allows many camera settings to be adjusted directly from the computer. Depending on the shooting mode, you can control settings such as:
- ISO
- Shutter speed
- Aperture
- White balance
- Exposure compensation
- Image quality
- Metering mode
- Focus mode
This is particularly useful during astrophotography sessions because the camera is often already mounted, balanced, focused, and pointed at the target. Being able to make adjustments from the laptop helps avoid unnecessary vibrations and saves time when fine tuning the setup.
For me, the initial setup was surprisingly straightforward. Within a few minutes of connecting the camera, I was ready to start creating capture sequences and automating my imaging sessions.
In the next section, I’ll show how I use DigiCamControl’s Bulb Mode (Astro Module) to automate image capture and break through the Nikon D3400’s 30 second exposure limit.
Using Bulb Mode (Astro Module) for Long Exposures
Once the camera is connected, the feature I use most often is DigiCamControl’s Bulb Mode (Astro Module). This is the tool I use for nearly every astrophotography session and the main reason I started using the software in the first place.
For Nikon D3400 users, the biggest advantage is the ability to capture exposures longer than 30 seconds. While the camera itself allows shutter speeds up to 30 seconds, anything longer requires bulb mode. The software handles this directly through the USB connection, making longer exposures easy to automate.
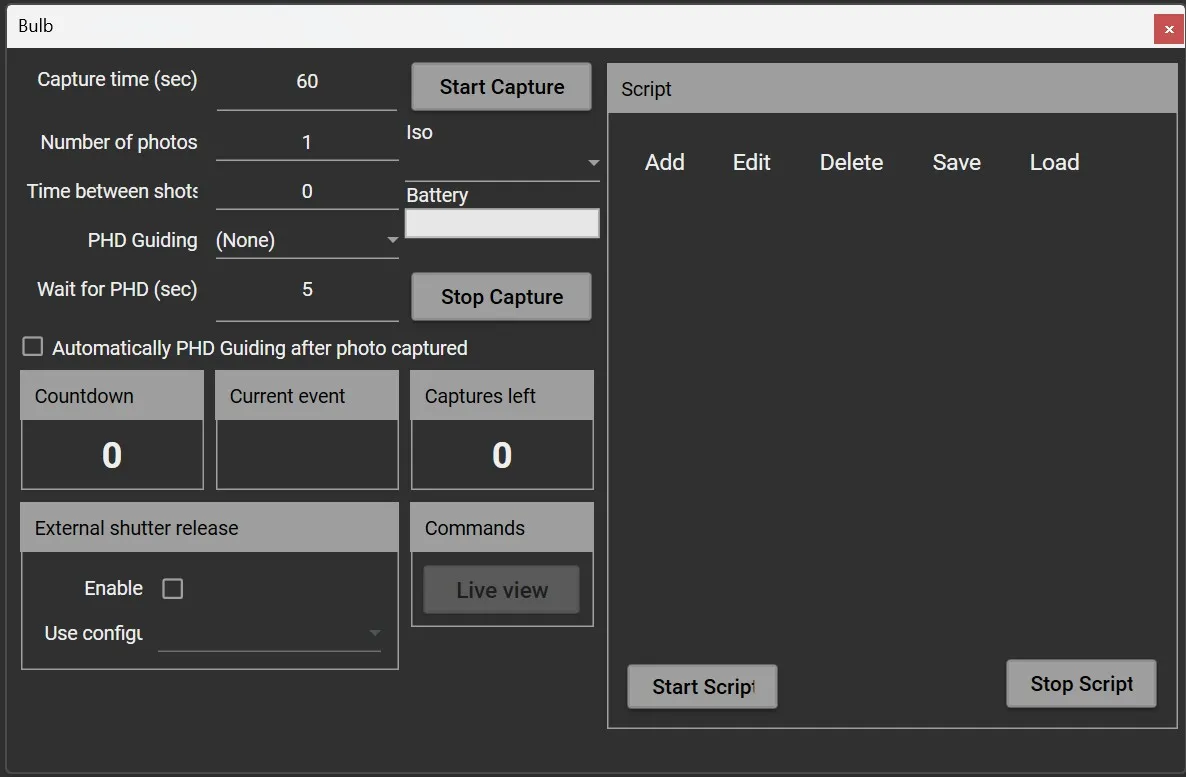 The Bulb Mode (Astro Module) window where exposure length, image count and delays can be configured.
At the same time, the Astro Module automates the entire imaging session. Instead of manually triggering every exposure, you can define the exposure length, number of images, and delay between shots, then let the software handle the rest.
This was particularly useful during my early untracked astrophotography sessions. Since exposure times were limited to only a few seconds, a single night could easily produce hundreds or even thousands of light frames.
The Astro Module completely removed that limitation.
Whether I’m capturing a few dozen long exposures or hundreds of short ones, the workflow is exactly the same.
Capture Time (sec)
This defines the exposure duration for each image.
Examples:
- 30 seconds
- 60 seconds
- 120 seconds
For tracked astrophotography, this is the setting that allows the Nikon D3400 to go beyond its normal 30 second shutter speed limit.
Number of Photos
This determines how many exposures will be captured before the sequence stops automatically.
Examples:
- 50 photos
- 100 photos
- 300 photos
Depending on the target and available imaging time, I simply enter the desired number and let the sequence run.
Time Between Shots
This controls the delay between exposures.
In most of my astrophotography sessions, I use a one second delay between shots. I’m not entirely sure it’s necessary, but I prefer giving the camera a brief moment between exposures rather than firing them back to back.
Whether it makes any practical difference or not, it has become part of my workflow over time.
Start Capture
Once everything is configured, pressing Start Capture begins the sequence.
The Astro Module then automatically controls the camera, keeps track of the remaining exposures, and displays a countdown timer showing the progress of the current capture.
What I appreciate most is the simplicity. The interface may not look particularly modern, but it is straightforward, reliable, and does exactly what I need.
After entering a few values, the DSLR can continue capturing images for hours without any intervention.
Even today, this is still how I capture all of my astrophotography data.
A Real Astrophotography Session
To show how I actually use DigiCamControl, let’s look at one of my Orion imaging projects.
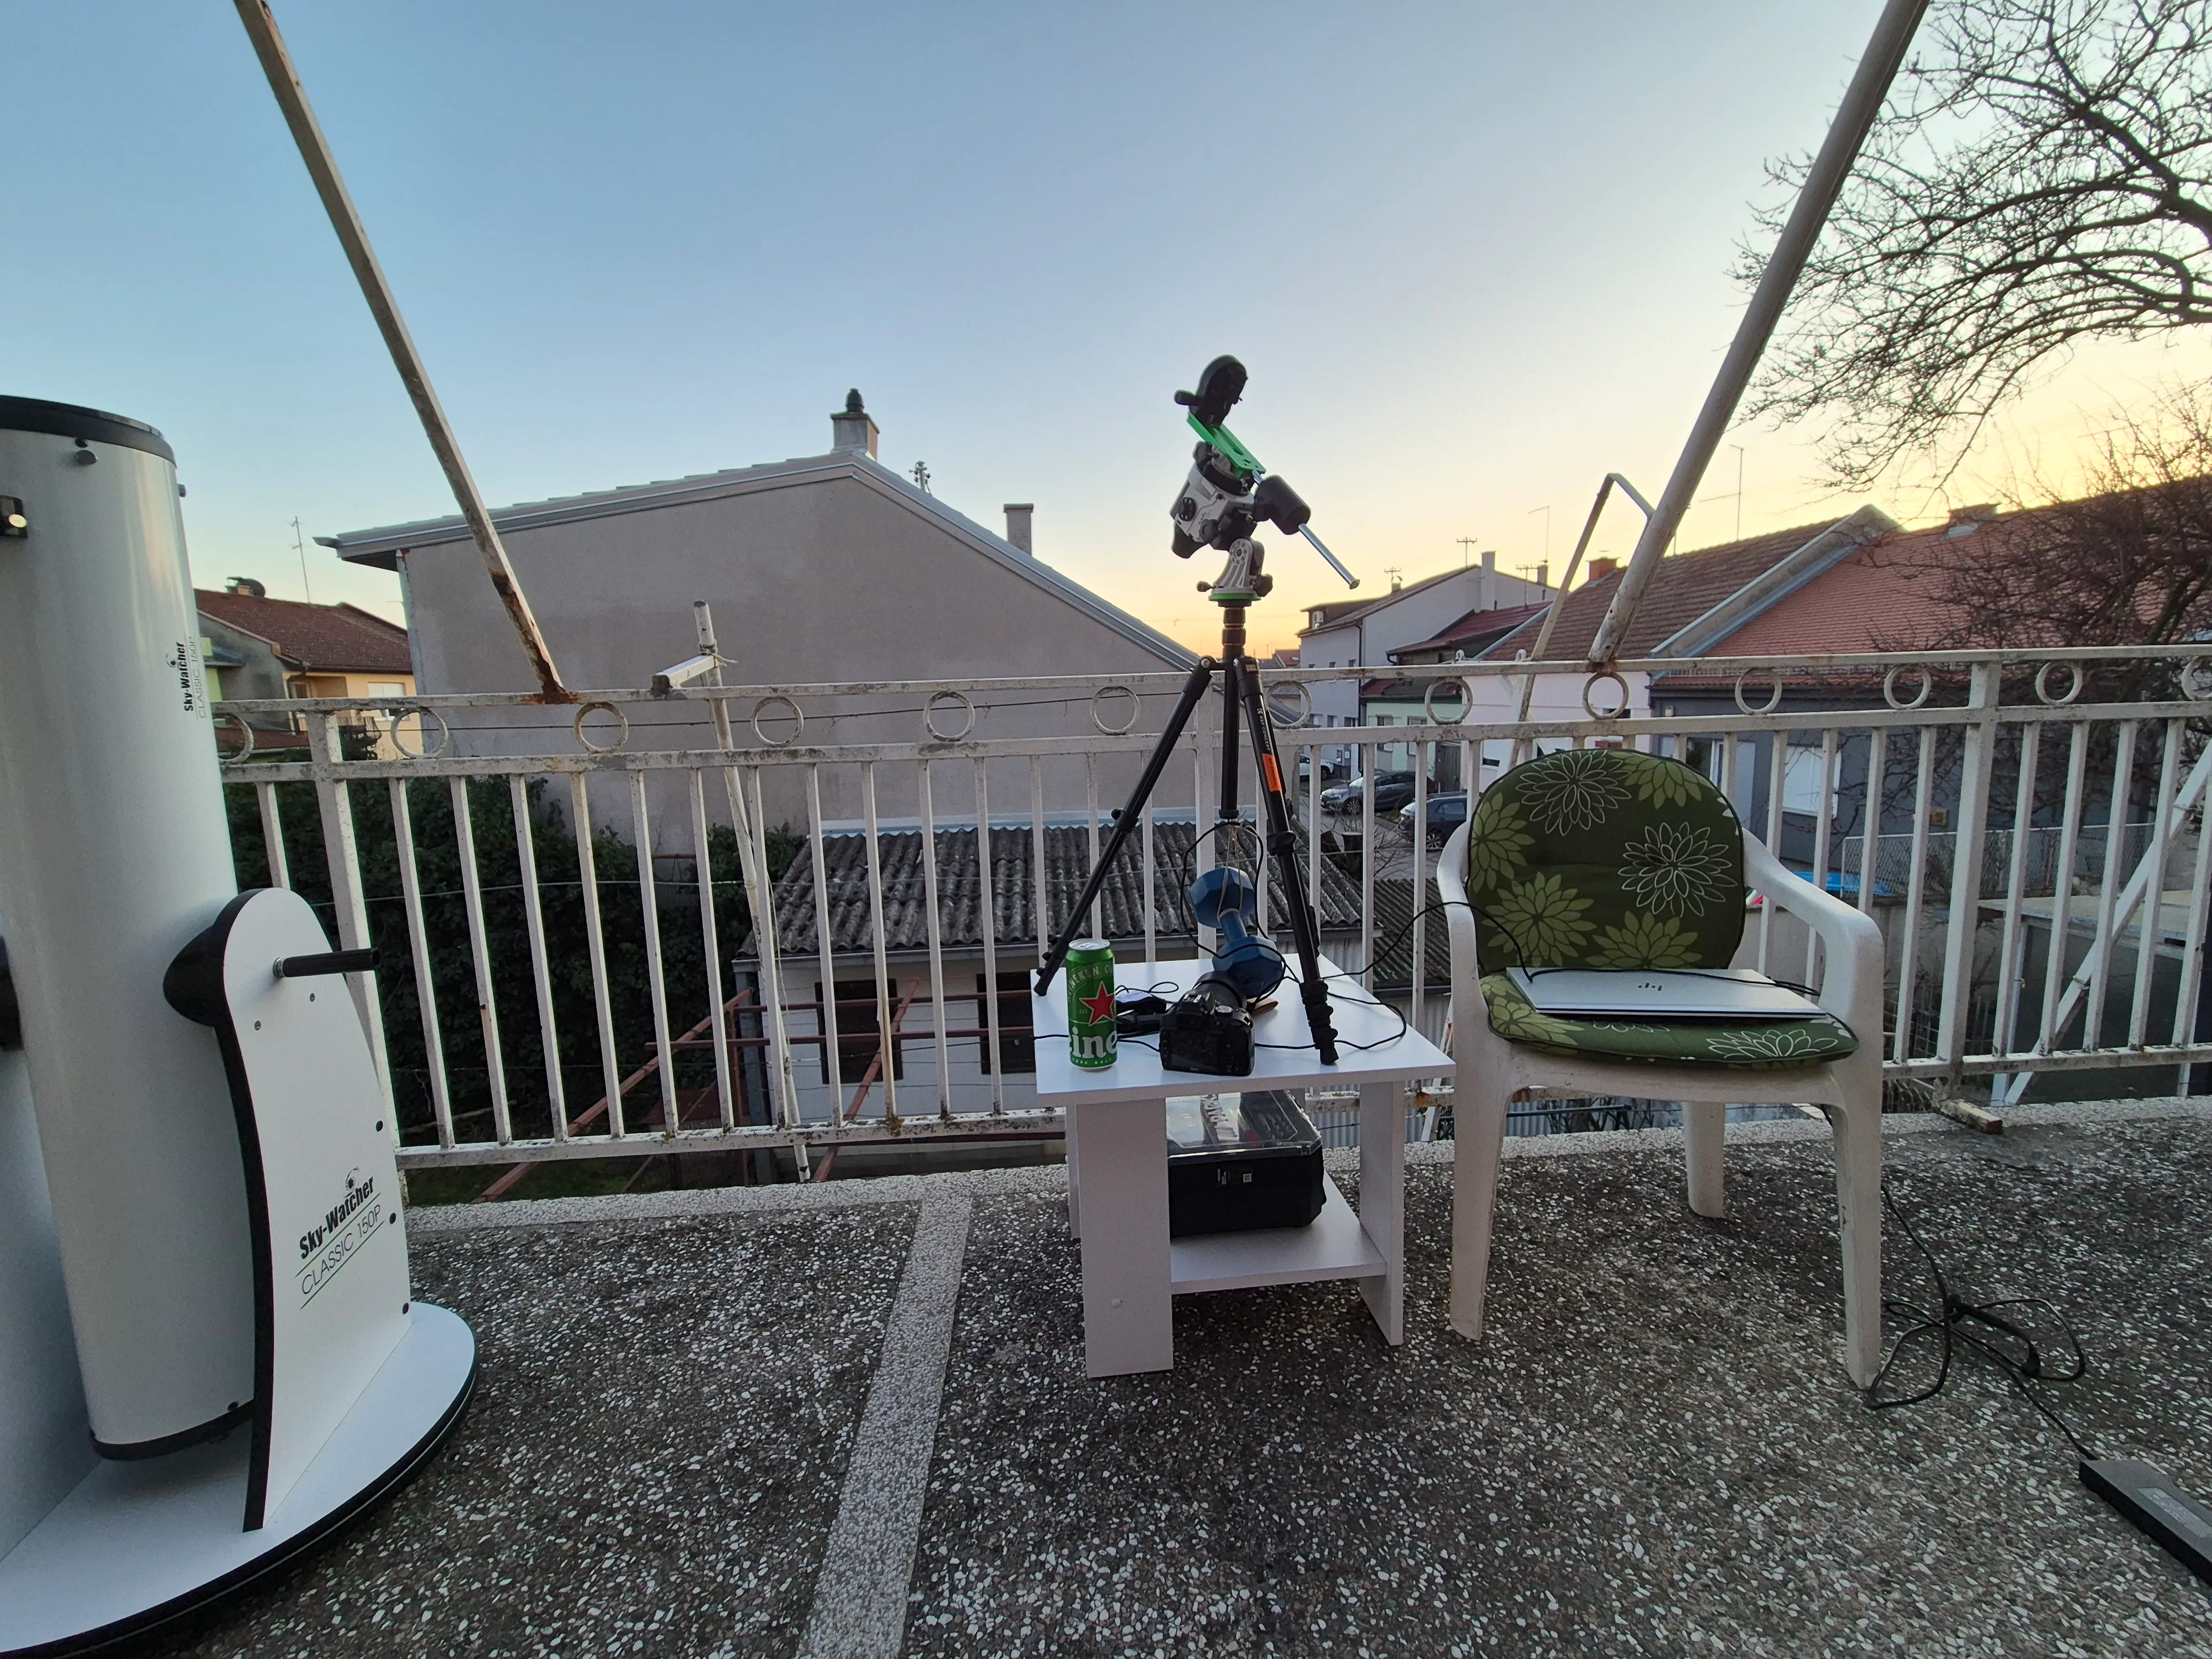
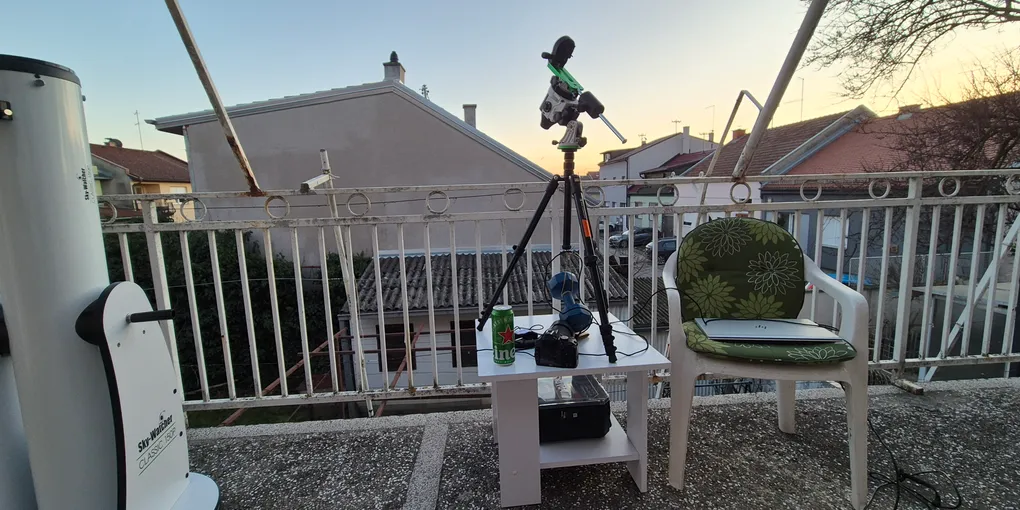
My typical backyard imaging setup. The Nikon D3400 is connected to a laptop running DigiCamControl while the Star Adventurer 2i handles tracking. During longer imaging sessions I often spend the waiting time observing through my Sky-Watcher 150/1200 Dobsonian.
Acquisition Details
Camera: Nikon D3400
Lens: Nikon 35mm
Aperture: f/2.8
ISO: 800
Subexposure Time: 30 seconds
Total Subexposures: 695
Total Integration Time: ~5h 47m
Tracking: Sky-Watcher Star Adventurer 2i
Light Pollution: Bortle 6–7
Capture Dates:
- 13 February 2026
- 17 February 2026
- 18 February 2026
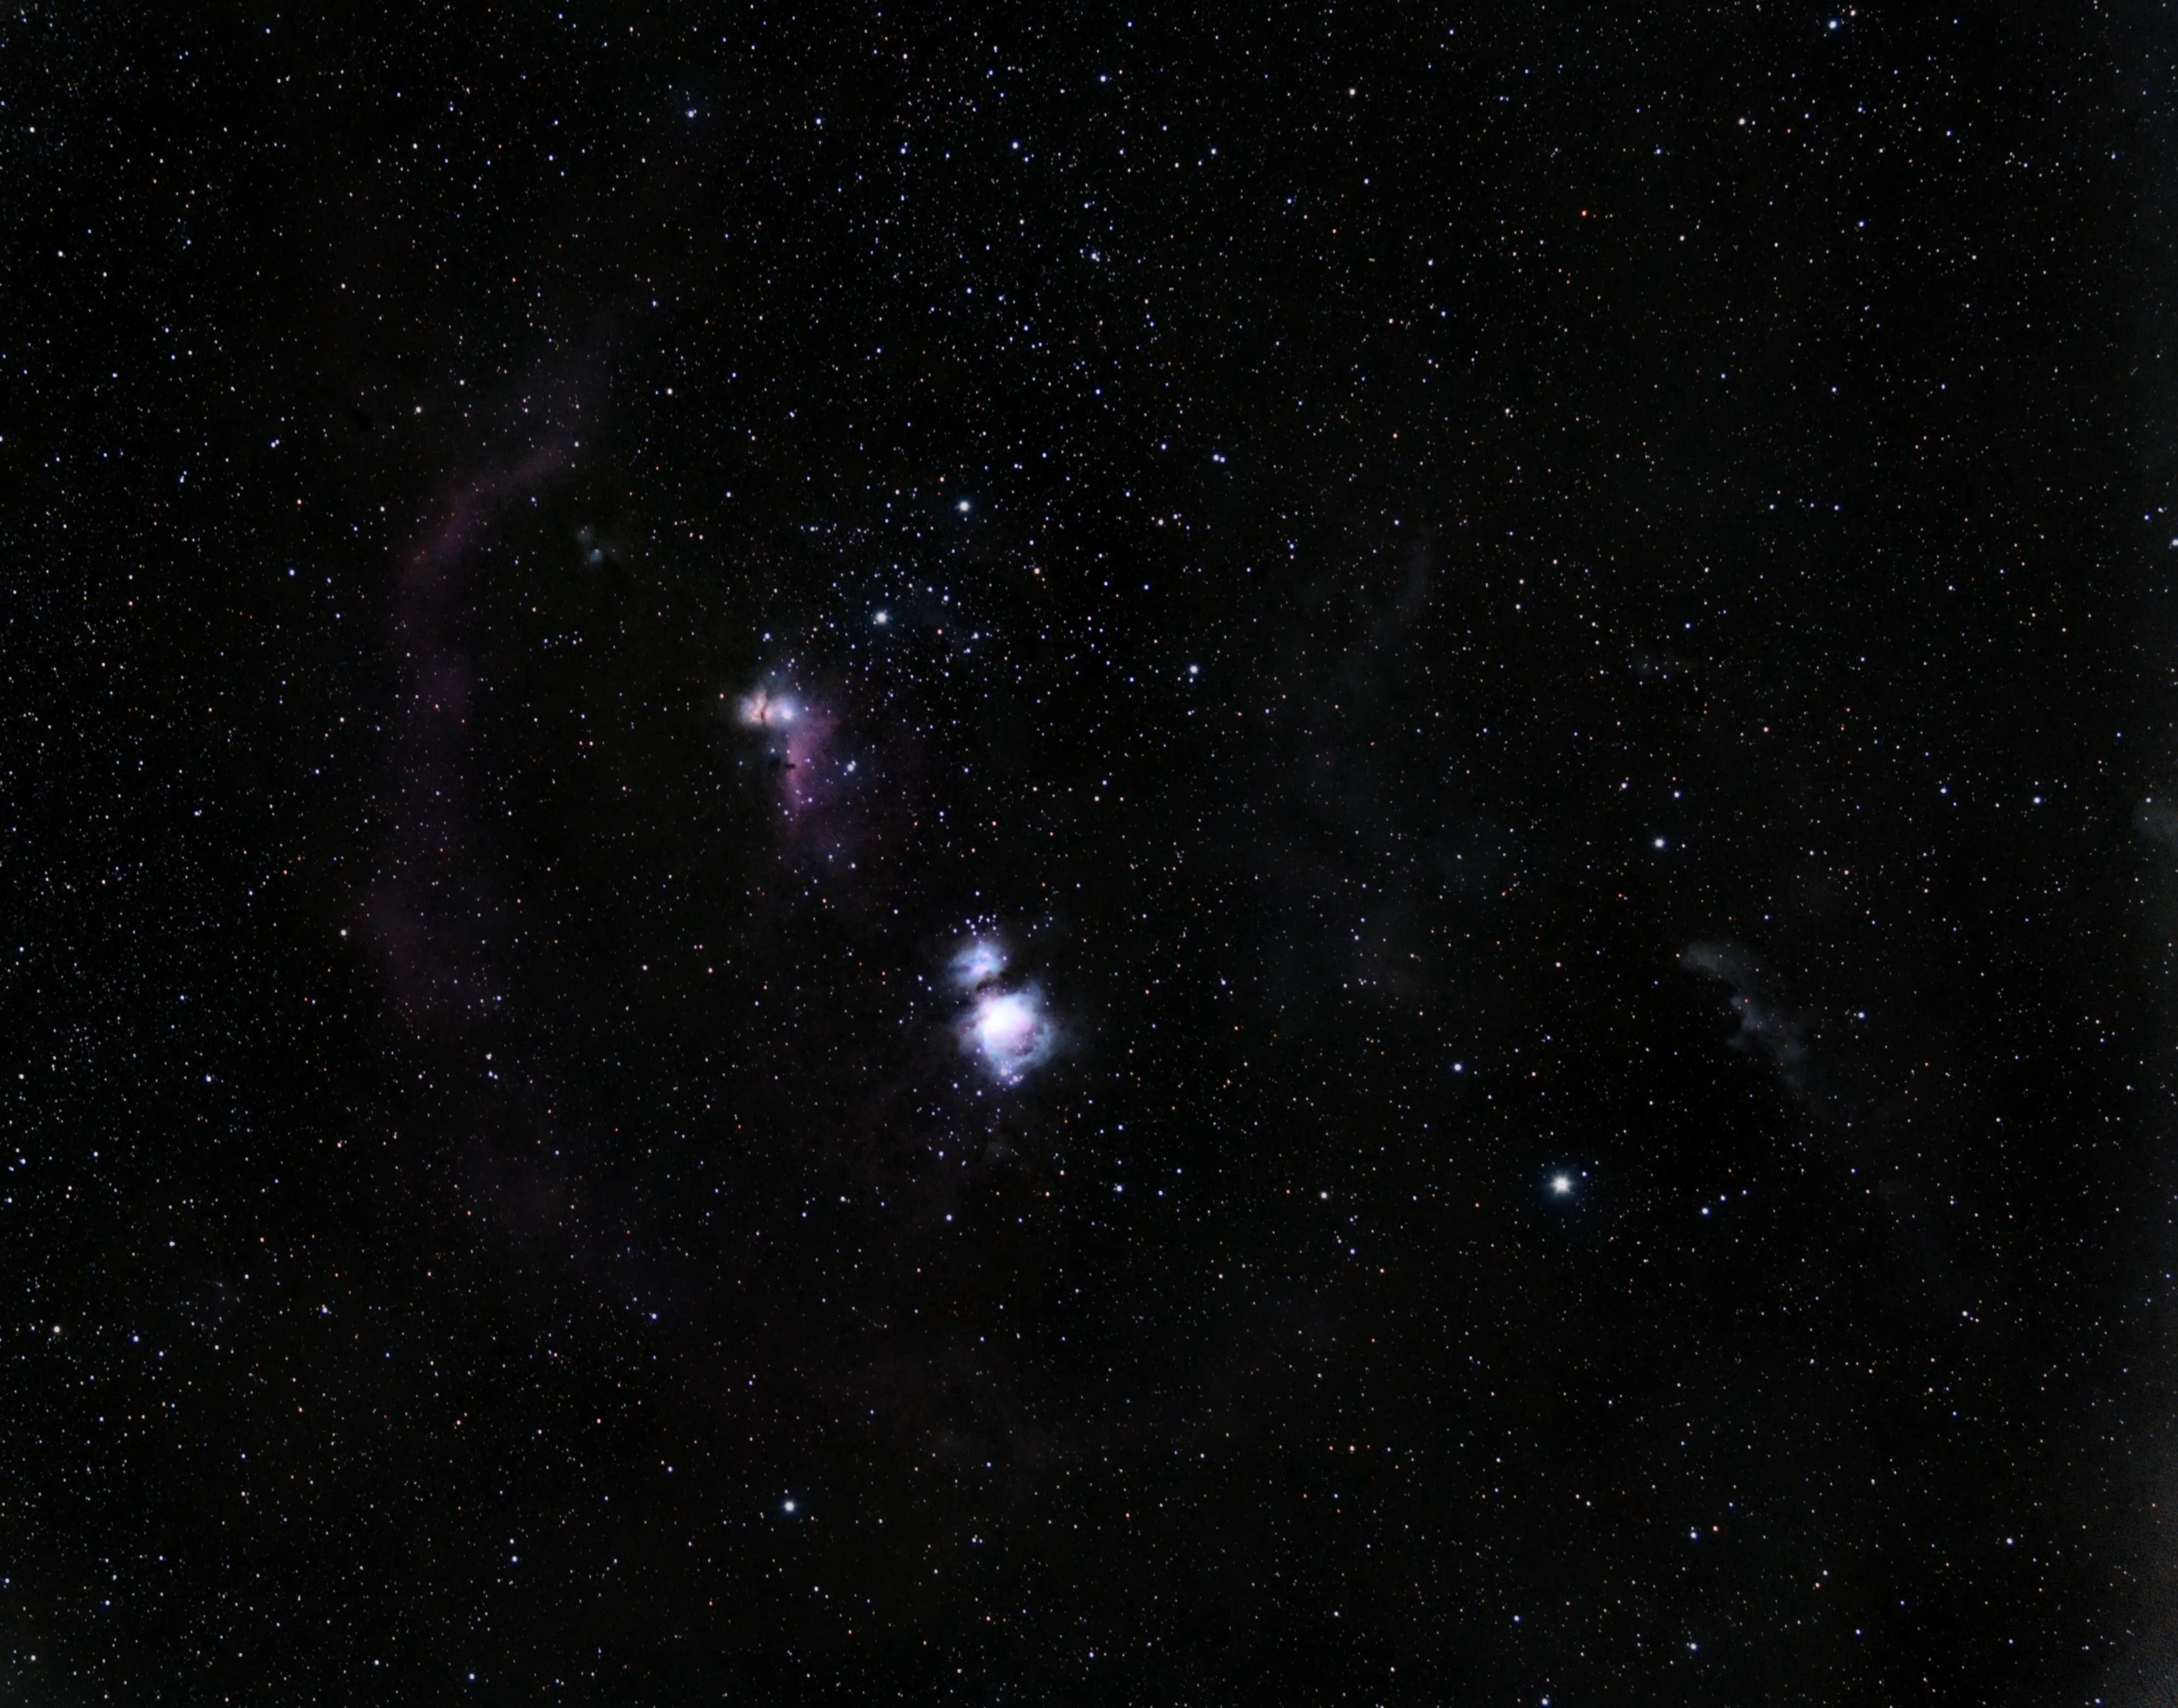
Final Orion Molecular Cloud Complex image created from 695 exposures captured using DigiCamControl and a Nikon D3400.
You can see the full image and acquisition details in my Orion Molecular Cloud Complex gallery entry.
Preparing the Session
Before starting the capture sequence, I set up the Star Adventurer 2i and performed polar alignment. My initial alignment was done using a compass and Polar Aligner Pro to get reasonably close to the celestial pole. After that, I refined the alignment using drift alignment to improve tracking accuracy.
Once the mount was aligned, I focused the lens, framed the Orion region, and captured a few test exposures to make sure everything looked correct.
Although I had previously managed exposures as long as two minutes without guiding using this setup, I decided to use 30 second subexposures for this project. The reason was simple: light pollution.
During these sessions, a nearby football training ground had its floodlights turned on for much of the evening. Any attempt to push exposure times significantly beyond 30 seconds resulted in a much brighter background and reduced the quality of the data. In this case, collecting more 30 second exposures made more sense than capturing fewer longer ones.
Configuring the Bulb Mode (Astro Module)
For this project, I configured DigiCamControl to capture 30 second exposures in small batches of roughly 10 to 20 images at a time.
I also used a one second delay between exposures. I’m not entirely sure it makes a practical difference, but I’ve always preferred giving the camera a brief pause between images rather than running exposures back to back.
After each batch, I manually dithered the framing before starting the next sequence.
Since I wasn’t using guiding, this was done by making a very small adjustment using the rotating panoramic head on my Star Adventurer L-bracket. The movement only needed to be slight, just enough to shift the framing a little between batches.
During the Capture Session
All images were saved directly to the SD card inside the camera.
Every 50 to 100 exposures, I transferred a few frames to the laptop and inspected them to make sure focus and framing had not drifted during the session.
One of the biggest advantages of using the software was the freedom it gave me once the sequence was running.
Before discovering it, I spent most of my time babysitting the camera and repeatedly triggering new image sequences. Now that it handles the image acquisition, I was free to enjoy the night sky instead.
During this project, I often spent that time observing through my Sky-Watcher 150/1200 Dobsonian while the DSLR quietly continued clicking and collecting data in the background.
Calibration Frames
The final image was calibrated using:
- Dark frames captured each night
- Flat frames captured each night
- A master bias frame reused between sessions
By the end of the project, the camera had collected 695 light frames, resulting in nearly six hours of total integration time and one of my most detailed widefield Orion images at the time.
A Few Tips From the Field
Over the past several months of using DigiCamControl with my Nikon D3400, I’ve picked up a few habits that make astrophotography sessions smoother and more enjoyable.
Keep a Spare Battery Handy
One thing I learned fairly quickly is that having a second battery is almost a necessity.
Since the camera remains connected to the laptop throughout the imaging session, battery life tends to be shorter than during normal photography. The last thing you want is for the battery to run out halfway through a clear night.
A fully charged spare battery has saved more than one session for me.
Prepare During the Day
Since I do all of my astrophotography from my backyard, I try to set up my equipment before sunset whenever possible.
I’ll assemble the tripod, mount, camera, and tracker during daylight and perform a rough polar alignment using a compass and Polar Aligner Pro. Once everything is ready, I simply leave the setup in place and wait for dusk.
As soon as the first bright stars or planets become visible, I can focus the camera, make any final adjustments, and start imaging much sooner than if I had begun setting everything up in the dark.
Secure the Focus Ring
If you’re using DSLR lenses, pay attention to the focus ring once focus has been achieved.
Many focus rings can be moved accidentally with surprisingly little force, especially on the kit lenses. This becomes even more likely if you’re using a dew heater or frequently adjusting cables around the camera.
Once I’m satisfied with focus, I secure the focus ring with a small piece of masking tape. It only takes a few seconds and can prevent an entire night of data from being ruined.
Add Weight to the Tripod
Adding some weight to the tripod can improve stability, especially on windy nights.
A backpack or in my case a dumbbell attached to the tripod can help reduce vibrations. Just make sure it is properly supported and not swinging freely underneath the tripod, as that can sometimes create more movement rather than less.
Avoid Extending the Thinnest Tripod Sections
If you’re using a lightweight tripod, try to avoid extending the smallest leg sections unless you really need the extra height.
On many tripods, these sections are the least rigid part of the entire setup and can make vibrations more noticeable.
I always keep them retracted whenever possible and put the whole rig on a sturdy table to get the extra height.
Don’t Forget to Enjoy the Night Sky
One of the biggest benefits of automating image capture is that you no longer need to constantly monitor the camera.
Instead of standing next to the setup waiting for exposures to finish, I usually spend that time observing through my Dobsonian, checking out planets, star clusters, or whatever else happens to be visible that night.
It’s easy to become so focused on collecting data that you forget to look up and enjoy the sky itself.
For me, that’s one of the nicest parts of automating the imaging process.
Frequently Asked Questions
Does DigiCamControl Work With the Nikon D3400?
Yes.
I’ve used DigiCamControl extensively with my Nikon D3400 for both untracked and tracked astrophotography sessions.
In my experience, the camera is detected quickly through a standard USB connection and works reliably with the Bulb Mode (Astro Module).
Can DigiCamControl Capture Exposures Longer Than 30 Seconds?
Yes.
This is one of the main reasons I use it.
By using the Bulb Mode (Astro Module), it controls bulb exposures directly from the computer, allowing exposure lengths well beyond the D3400’s normal 30 second limit.
Do I Need an Intervalometer?
No.
The Nikon D3400 does not include a dedicated intervalometer port, but DigiCamControl can automate image capture through the camera’s USB connection.
For many astrophotography workflows, this removes the need for a separate intervalometer entirely.
Are Images Saved to the Computer or Camera?
Both options are available.
The software gives you flexibility to choose whichever workflow you prefer.
For astrophotography, I generally prefer saving directly to the camera’s SD card because it keeps the setup simple and avoids filling laptop storage during longer sessions.
Does DigiCamControl Need an Internet Connection?
No.
Once installed, DigiCamControl works entirely offline.
This is particularly useful for astrophotography sessions in the backyard or at remote observing locations where internet access may be limited or unavailable.
Is DigiCamControl Free?
Yes.
DigiCamControl is completely free to download and use.
That is one of the reasons it has remained part of my Nikon D3400 astrophotography workflow for so long.
Final Thoughts
The Nikon D3400 may not be the first camera that comes to mind for astrophotography, especially once you discover its lack of an intervalometer port and 30 second shutter speed limitation.
Fortunately, it solves both of those problems surprisingly well.
For me, it transformed the Nikon D3400 from a camera that required constant attention into one that could run entire imaging sessions on its own. Whether I was capturing hundreds of short untracked exposures or several hours of tracked data on the Star Adventurer 2i, DigiCamControl allowed me to spend less time managing the camera and more time enjoying the night sky.
The interface may look a little dated compared to modern astrophotography software, but it remains reliable, lightweight, easy to use, and most importantly, it gets the job done.
If you’re using a Nikon D3400 for astrophotography, DigiCamControl is one of the most useful pieces of software I’ve come across.
It solved two of the camera’s biggest limitations for me: the 30 second exposure limit and the lack of a practical way to automate long imaging sessions.
More importantly, it allowed me to spend less time managing the camera and more time actually enjoying the night sky. Even after moving from untracked imaging to a Star Adventurer 2i, it remains a part of every astrophotography session I run.
For a free piece of software, that’s difficult to argue with.
If you’re new to astrophotography, you may also find my Nikon D3400 Astrophotography Guide useful. You can also browse my gallery to see what I’ve been able to capture using this camera from a suburban backyard under Bortle 6–7 skies.
Clear skies!